Develop in a Notebook#
Welcome to the “Develop in a Notebook” section! Here, we’ll explore the fundamentals of efficiently developing Panel apps directly within a notebook environment.
Let’s dive in!
Preview Your App#
Let’s preview our app.
Start by creating a new notebook named app.ipynb.
Preview Example#
Here’s a simple notebook containing a Panel app:
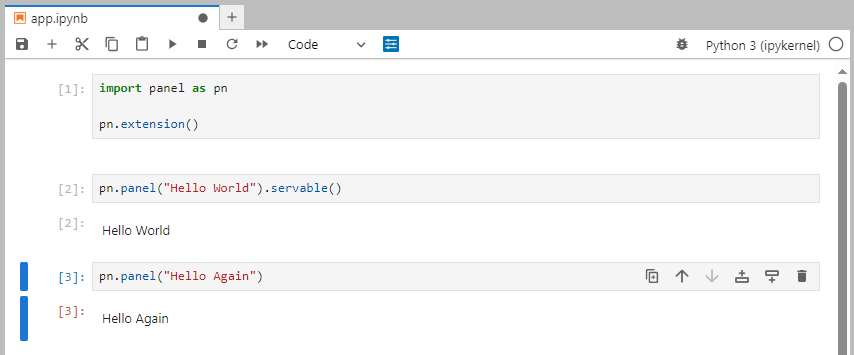
Copy and paste the following code cells into your notebook:
import panel as pn

pn.extension()
pn.panel("Hello World").servable()
pn.panel("Hello Again")
Run the cells and save the notebook as app.ipynb.
Note
The Jupyter Panel Preview feature described below works exclusively within the JupyterLab interface. It does not support the Classic Jupyter Notebook interface.
To use this preview feature, please ensure you are working within a JupyterLab environment.
You can now preview the app by clicking the Jupyter Panel Preview icon. This icon can be found above the notebook.
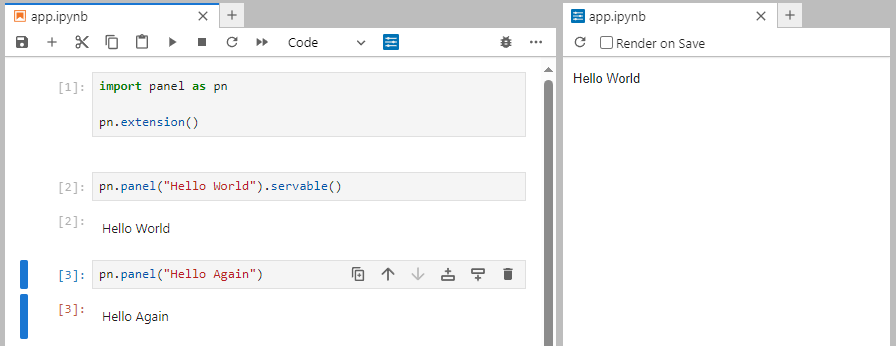
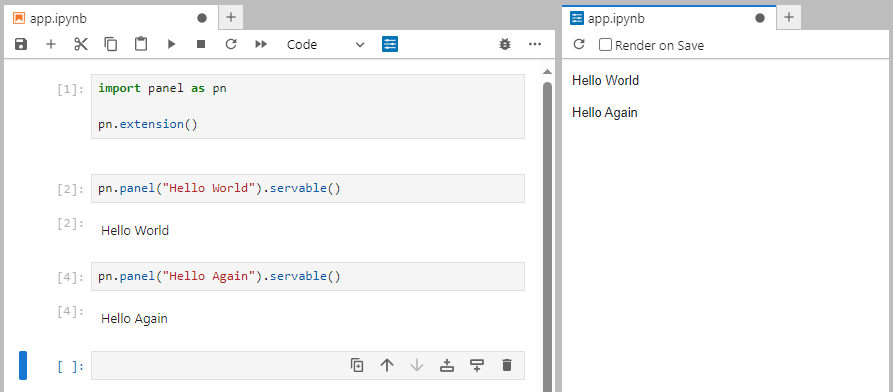
Upon clicking the Jupyter Panel Preview icon, you’ll see your app launch in a separate window. If “Hello Again” isn’t displayed, it’s because it hasn’t been marked as .servable(). Update the cell containing pn.panel("Hello Again") to include .servable() and save the notebook. Click the Reload Preview button in the Jupyter Panel Preview.
It should look like
Tip
You can enhance your workflow by enabling auto-reload with the Render on Save option, which automatically reloads your app when the notebook is saved.
The video shows how a larger app could be developed.
Serve Your App with Autoreload#
Alternatively, you can serve your notebook externally with autoreload using the following command:
panel serve app.ipynb --autoreload
This method provides a faster alternative to the Jupyter Panel Preview. Check out the video for inspiration.
Code
import panel as pn
import numpy as np

from matplotlib.figure import Figure

ACCENT = "goldenrod"
LOGO = "https://assets.holoviz.org/panel/tutorials/matplotlib-logo.png"

pn.extension(sizing_mode="stretch_width")
data = np.random.normal(1, 1, size=100)
fig = Figure(figsize=(8,4))
ax = fig.subplots()
ax.hist(data, bins=20, color=ACCENT)

component = pn.pane.Matplotlib(fig, format='svg', sizing_mode='scale_both')

pn.template.FastListTemplate(
    title="My App", sidebar=[LOGO], main=[component], accent=ACCENT
).servable();
Inspect a Component using SHIFT+Tab#
Start from an empty notebook named app.ipynb.
Copy-paste the code below into the first cell
import panel as pn

pn.extension()
Run the cell.
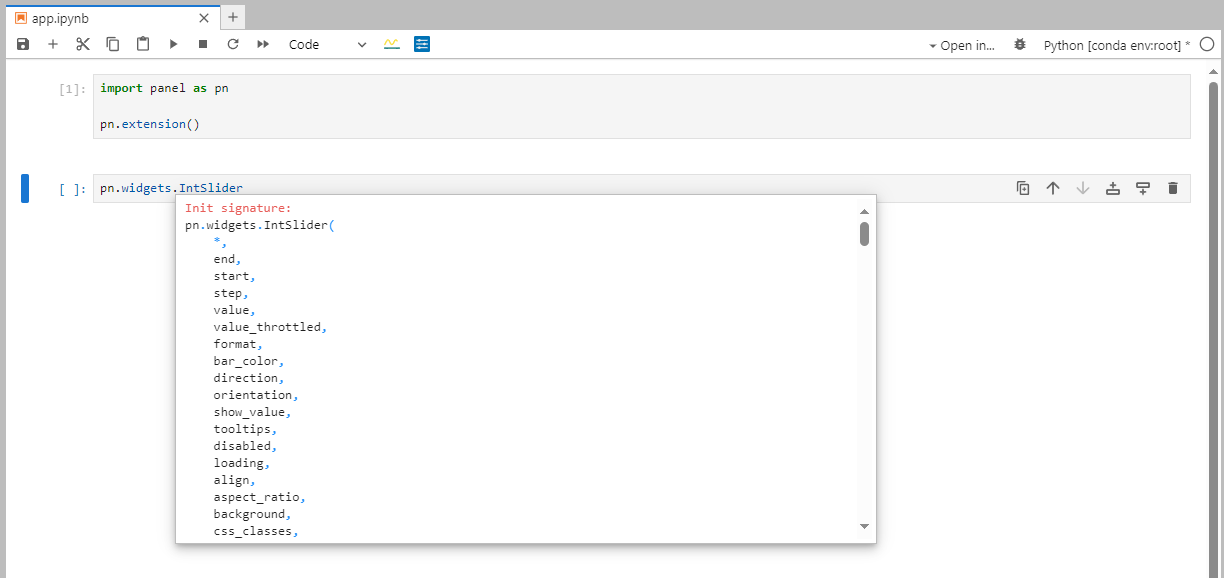
Write pn.widgets.IntSlider in a cell and press SHIFT+Tab.
It should look like
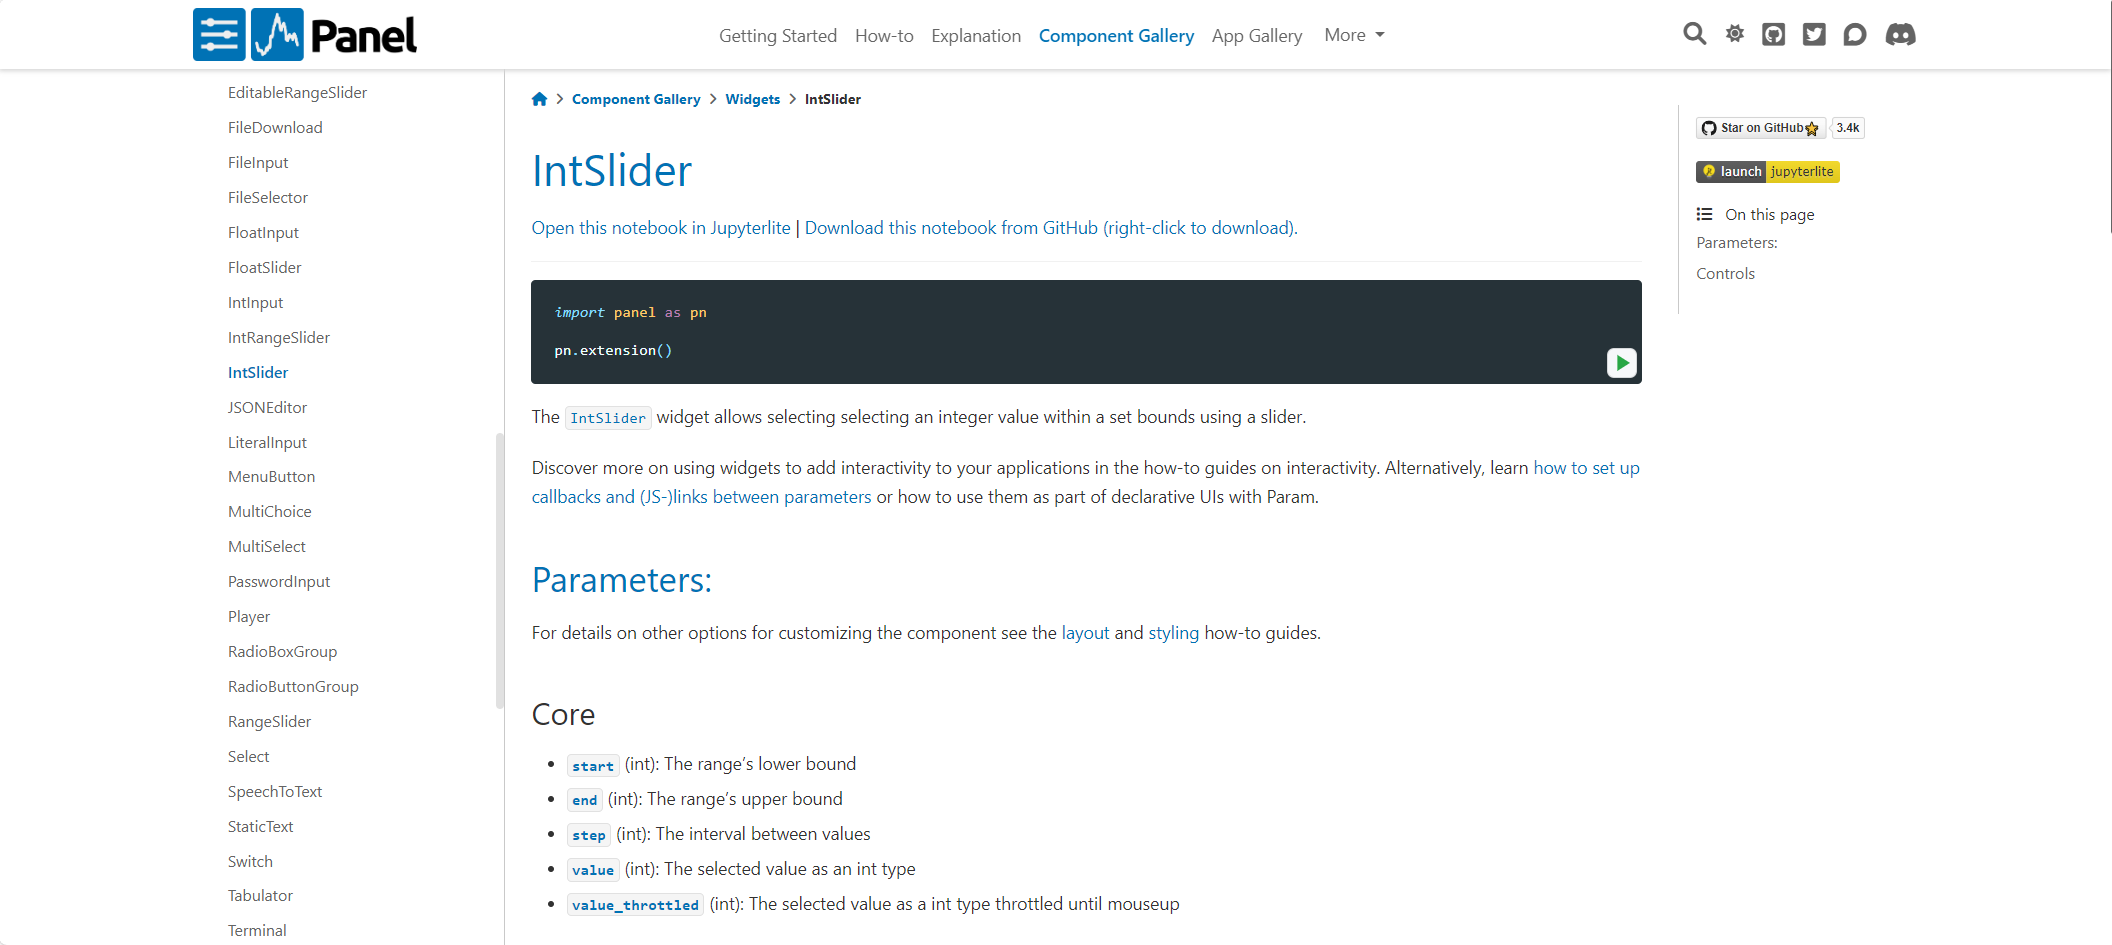
Use the mouse to scroll down until we find the Example code snippet and Reference link.

Click the Reference link https://panel.holoviz.org/reference/widgets/IntSlider.html.
It should now look like
Tip
It is a great idea to use the Example code snippets and Reference links to speed up our workflow.
Inspect a Component using print#
Start from an empty notebook named app.ipynb.
Copy-paste the code below into the notebook.
import panel as pn

pn.extension()
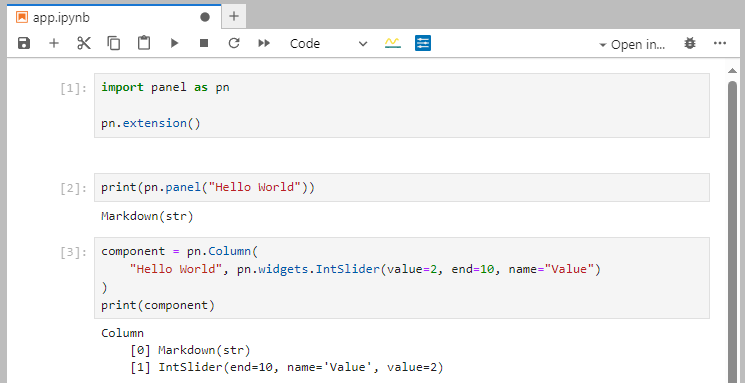
print(pn.panel("Hello World"))
component = pn.Column(
    "Hello World", pn.widgets.IntSlider(value=2, end=10, name="Value")
)
print(component)
Run the cells if they have not already been run.
It should look like
Note
By printing layout components like Column we can understand how they are composed. This enables us to access the subcomponents of the layout.
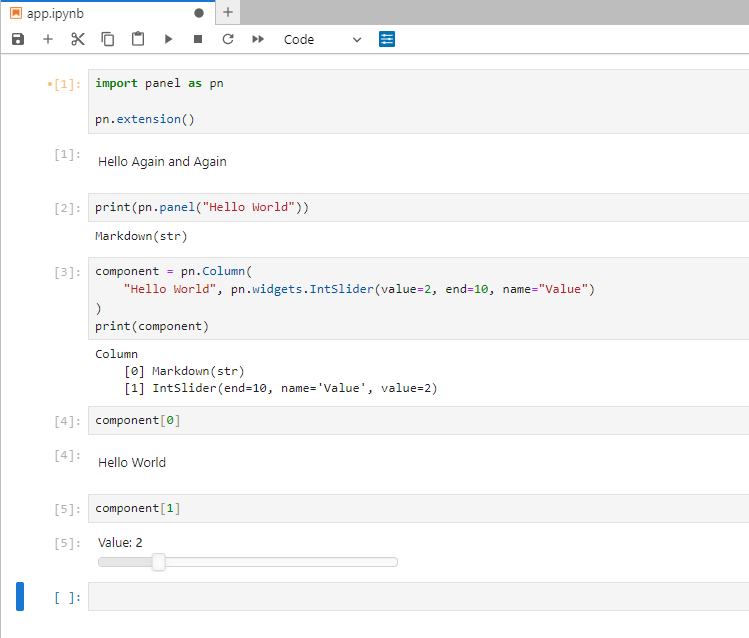
Add the two code cells below
component[0]
component[1]
Run the cells if they have not already been run.
It should look like
Inspect a Component’s Parameters using .param#
Start from an empty notebook named app.ipynb.
Copy-paste the two code cells below into the notebook.
import panel as pn

pn.extension()
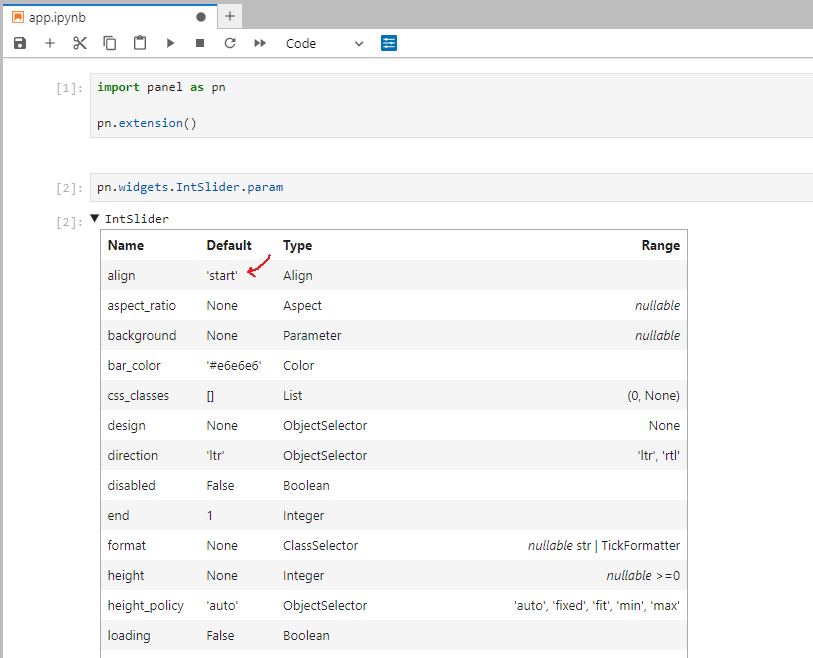
pn.widgets.IntSlider.param
Run the cells if they have not already been run.
It should look like
Note
The
.paramtable shows us the default parameter values of theIntSliderclass. For example, the default value ofalignis'start'.The
.paramtable shows us additional information like theTypeandRangeof the Parameter.
Add the new cell
pn.widgets.IntSlider(align="end").param
Run the code cell.
It should look like
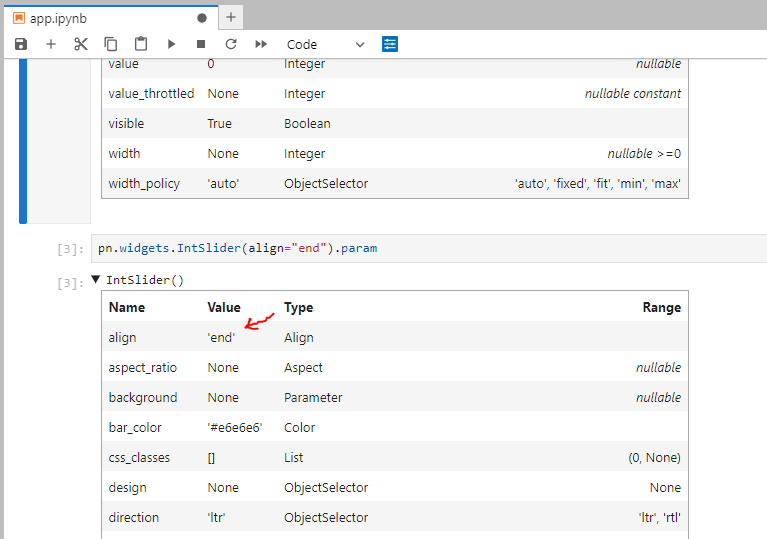
Note
In the picture above we see the actual parameter values of the
IntSliderinstance. For example, the actual value ofalignis'end'.
Recap#
In this section, we covered:
Previewing a notebook app with the Jupyter Panel Preview.
Serving a notebook app with autoreload.
Inspecting components using
SHIFT+Tab,print, and.param.
Now you’re equipped with the tools to efficiently develop Panel apps directly within a notebook environment!
Resources#
For more detailed instructions and explanations, check out the resources below:
Happy developing! 🚀
