Configure PyCharm#
This guide addresses how to configure PyCharm for an efficient Panel development workflow.
We assume you have a basic understanding of working with Python projects in PyCharm, including running and debugging Python applications.
Note
In the following, we assume you have already created a Python project, installed Panel, and other requirements, and created your Panel file.
Serve from the Terminal#
You can use panel serve to serve apps from the PyCharm terminal, just as you would with in any other terminal.
Run/Debug Configurations#
To learn how to configure PyCharm in general, check out the official guide.
To enable you to run and debug Panel apps in PyCharm, you should create a configuration as shown below:
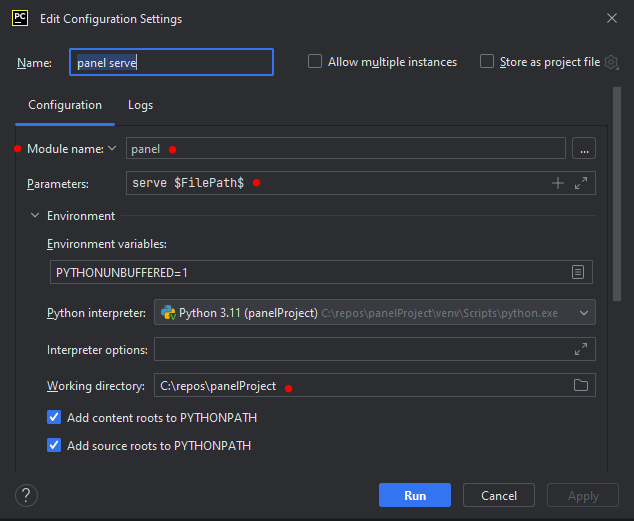
Configuration Name:
panel serveModule Name:
panelParameters:
serve $FilePath$Working Directory: The path to your project root
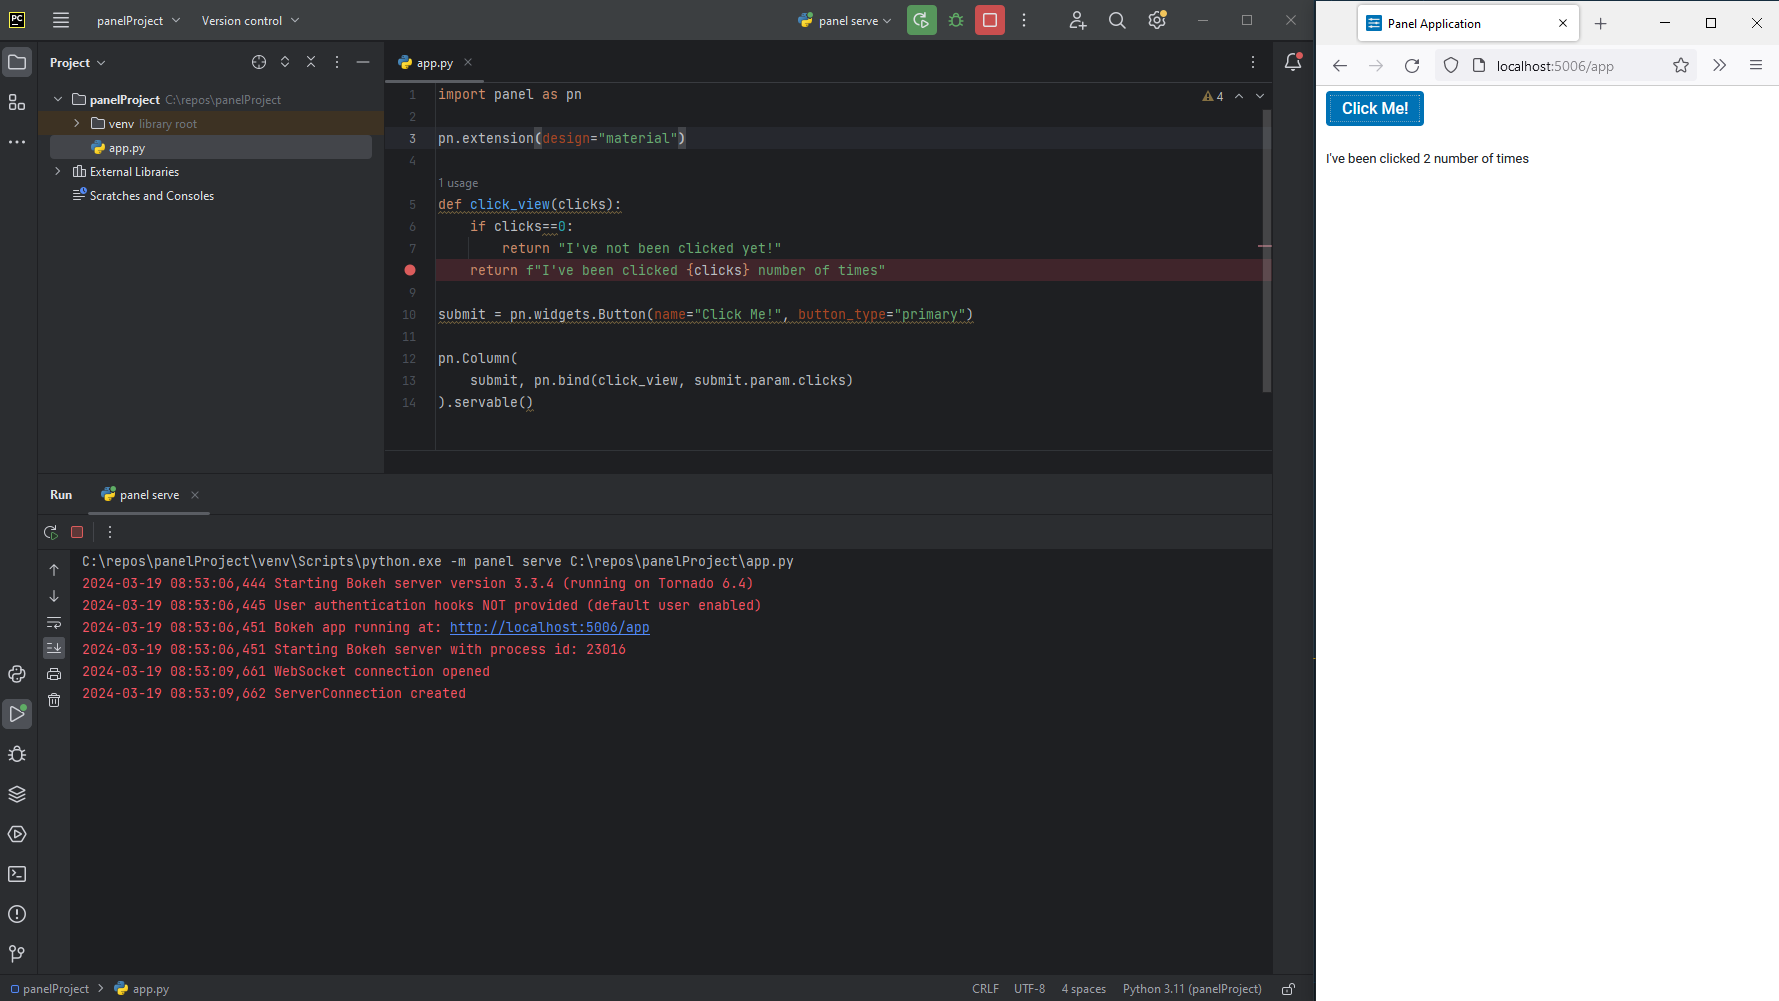
Run#
With the configuration in place, you can now easily run Panel apps via the panel serve configuration.
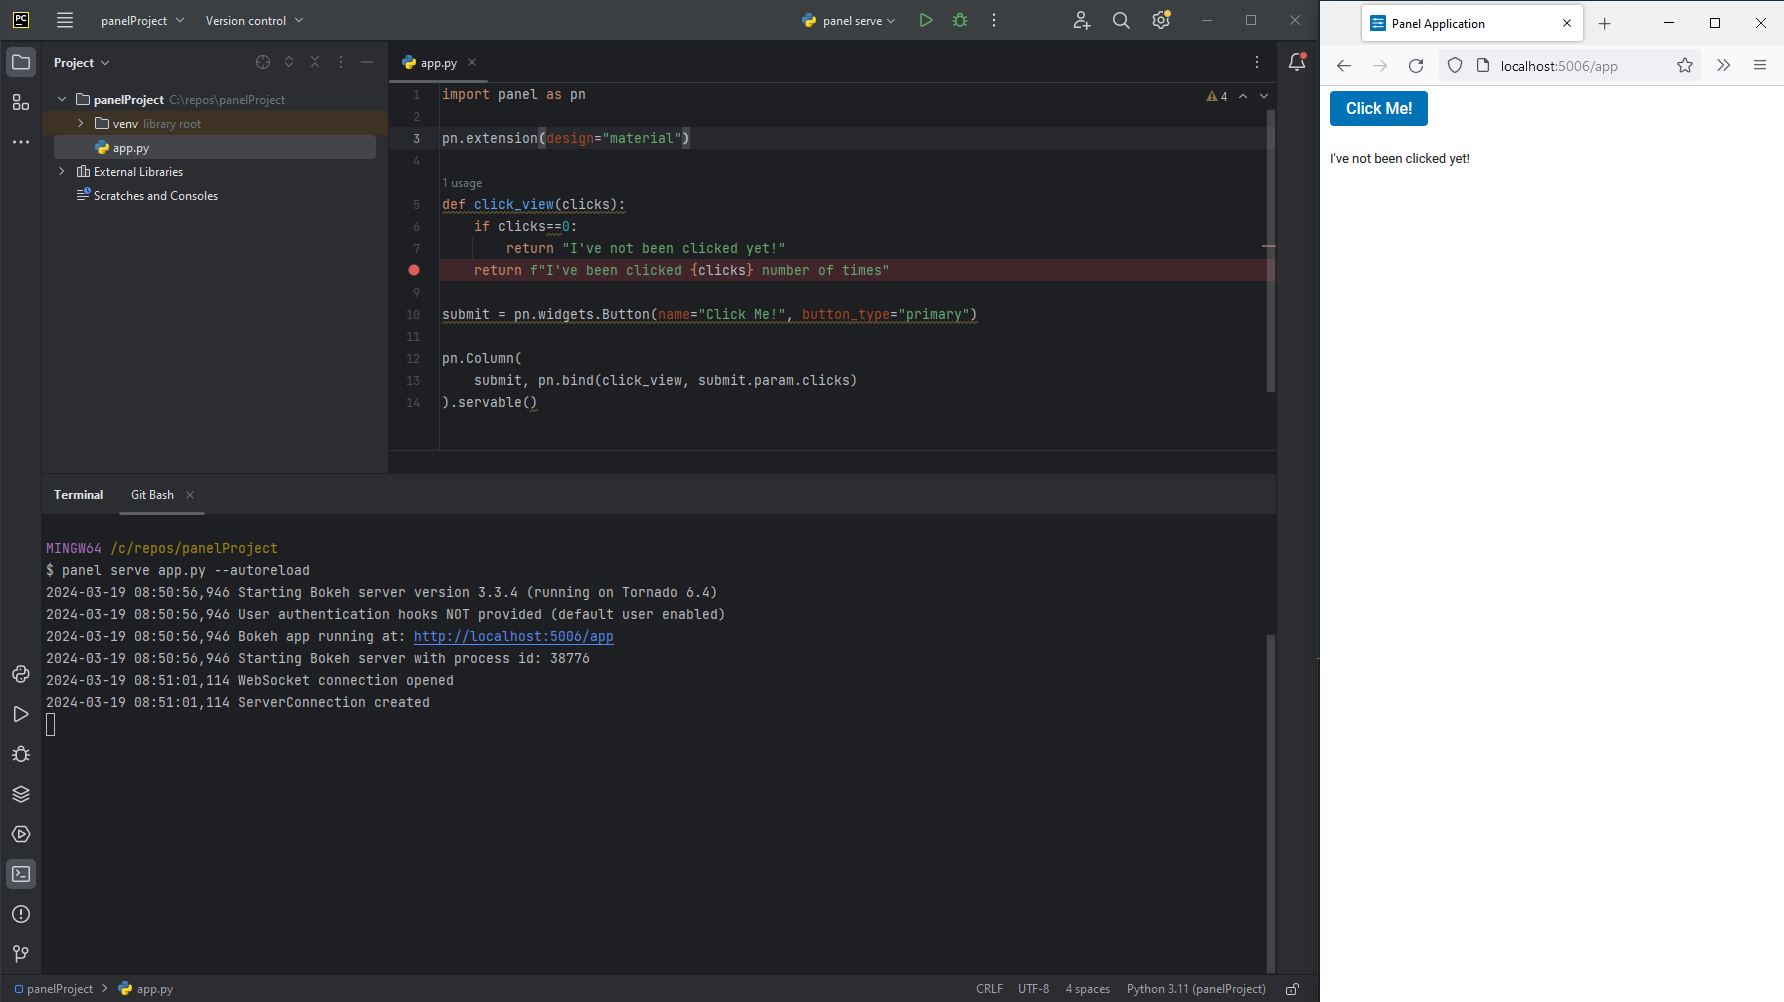
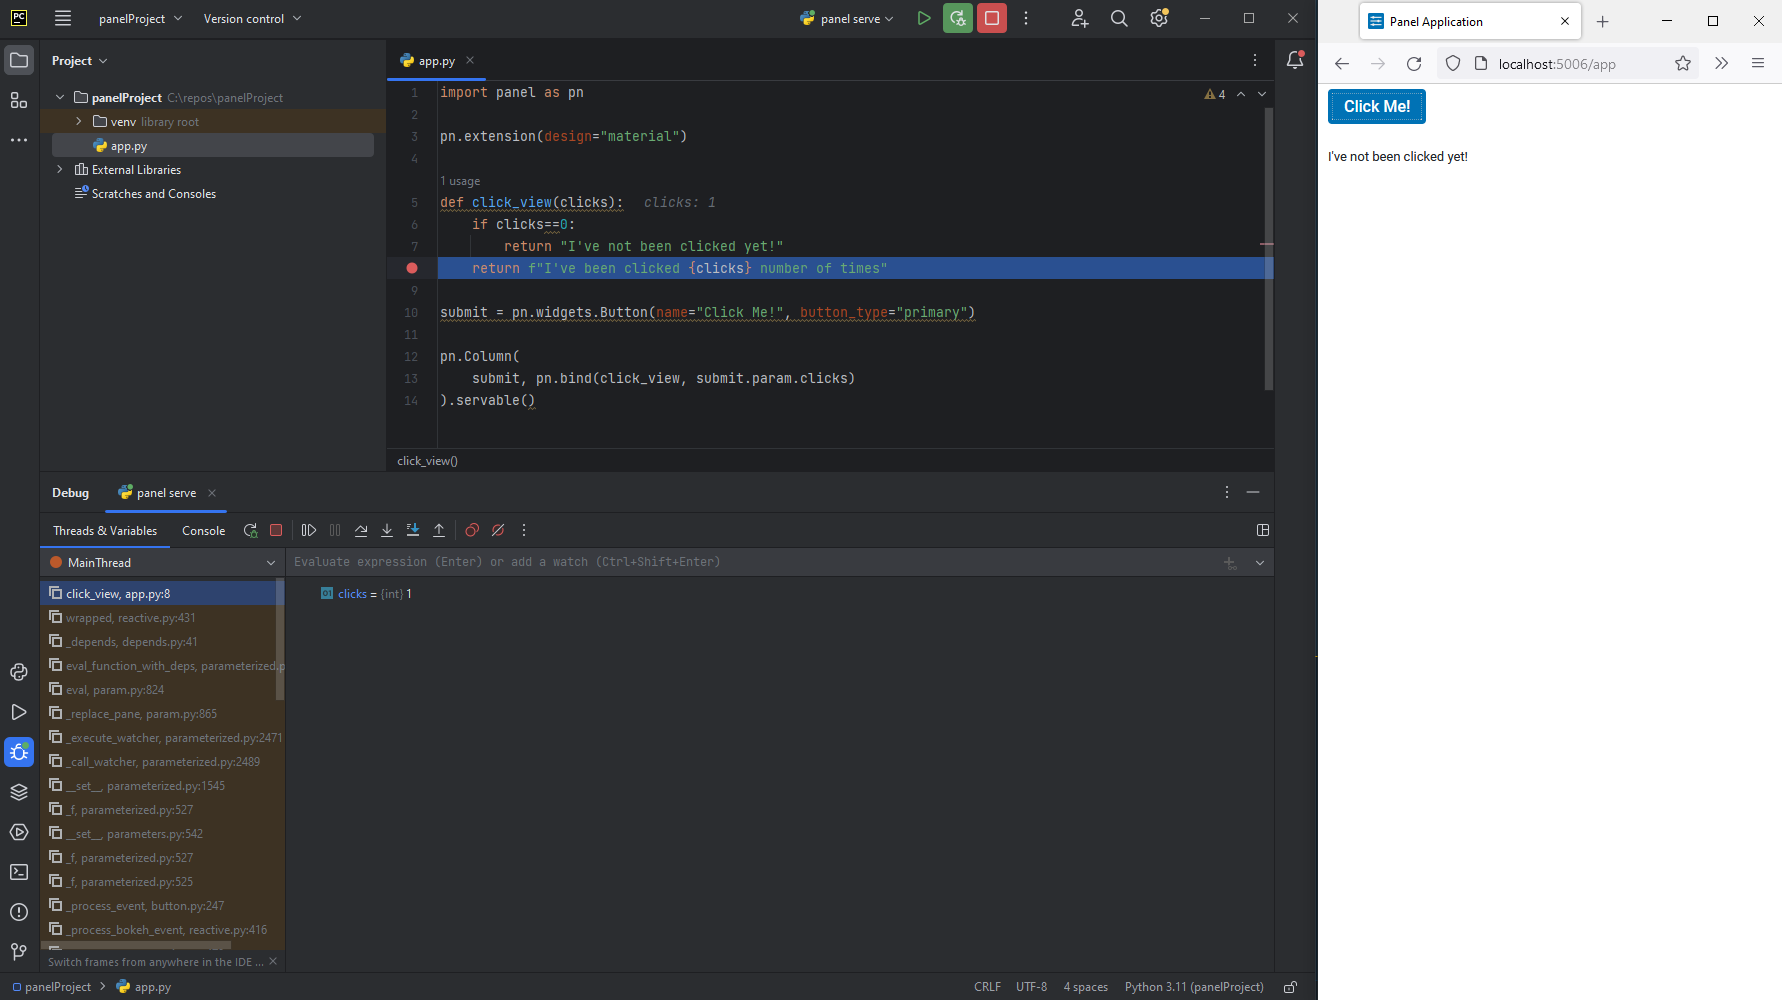
Debug#
With the configuration in place, you can now easily debug Panel apps via the panel serve configuration. The picture below shows debugging in action, where a breakpoint is hit when the Button is clicked.
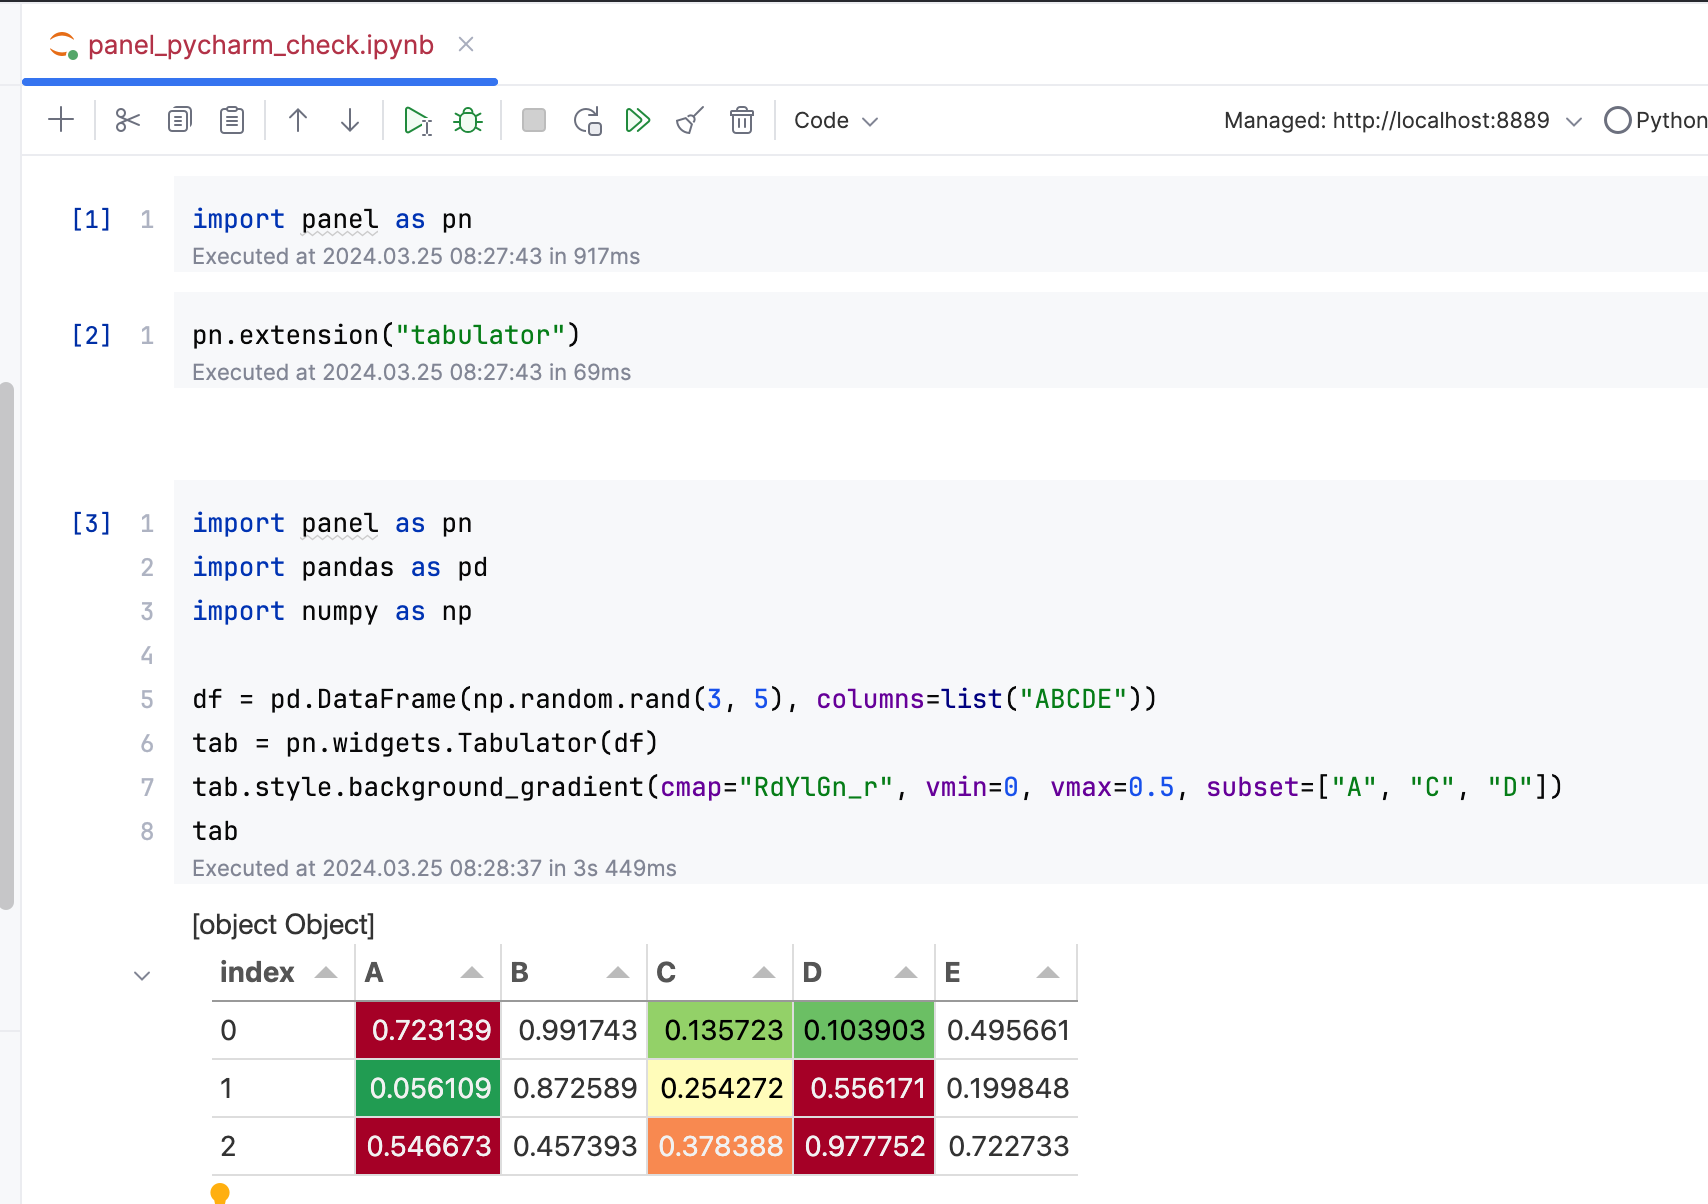
Notebook Environment#
PyCharm Professional offers support for Jupyter Notebooks and ipywidgets, enhancing interactive Python development.
To integrate Panel effectively, ensure the installation of jupyter_bokeh by executing pip install jupyter jupyter_bokeh or conda install jupyter jupyter_bokeh. Subsequently, activate the extension using pn.extension().
Below, observe the implementation of a notebook within the PyCharm Notebook Environment.